


"How To" install CentOS 3 with BlueQuartz on a Cobalt RaQ3 / RaQ4 Server Appliance
Document Version: 006c.12-October-2006 Howie Dines

Step 1 - Prepare hardware and software for install
The aim of this procedure is to make a single drive that can be
swapped into a RaQ3/4 following it's firmware/BIOS update.
There is a lot of discussion about exactly what drives are compatible
with the RaQ3. I won't touch on this, but for the record I've had
success with both Maxtor 2B020H1 (20GB) and Seagate Barracuda ST380021A
(80GB) drives.
This procedure relies on the successful BIOS/rom update to version
cobalt-2.10.3-ext3-1M.rom
For more info in Rom updates, see the links at the bottom of this page.
In addition, CentOS 3 requires a min of 256MB ram to run successfully.
I also like to upgrade the processor to the 500MHz at this stage.
(I prefer the solder option over the 'speaker wire' option!)
The serial/com port is required for console connection during the procedure.
The appliance should therefore be configured and TESTED
with the console connection.
Download and burn the 3x iso's of CentOS 3.7 for the i386
Select a mirror site from the following link:-
http://isoredirect.centos.org/centos/3/isos/i386/
A number of extra files are required during the procedure. I like to create a
tar file with all files required. I then place this on a ftp/web server. The tar
file can then be downloaded to the RaQ with the wget command in one transfer.
Files required:-
Located on the CentOS CD disk 1 /RedHat/RPMS/
(Be sure to only get the i386 versions!)
gd-1.8.4-12.3.1.i386.rpm
glibc-2.3.2-95.37.i386.rpm
glibc-common-2.3.2-95.39.i386.rpm
glibc-devel-2.3.2-95.39.i386.rpm
glibc-headers-2.3.2-95.39.i386.rpm
glibc-kernheaders-2.4-8.34.2.i386.rpm
openssh-3.6.1p2-33.30.6.i386.rpm
openssh-askpass-3.6.1p2-33.30.6.i386.rpm
openssh-askpass-gnome-3.6.1p2-33.30.6.i386.rpm
openssh-clients-3.6.1p2-33.30.6.i386.rpm
openssh-server-3.6.1p2-33.30.6.i386.rpm
openssl-0.9.7a-33.17.i386.rpm
The BlueQuartz tarball from
http://bluequartz.org/pub/BlueQuartz/5100R/CentOS3/tgz/
(be sure to get the latest i386 one)
BlueQuartz-5100R-CentOS3-i386-2006011501.tar.gz
The Kernel and LCD drivers from
http://www.osoffice.co.uk/linux/
Available from my Dincom mirror
modules.tar.gz
vmlinux.bz2
panel_scripts_alpine_1_0_13.rpm
panel_utils_5_0_6_13_I386.rpm
A pair of tar files containing the updated bootup files to make the LCD function during Bootup / Shutdown
Available from my Dincom mirror
dincom-lcd1.tar
dincom-lcd2.tar
The final two files to include are the default config file used when we install phpMyAdmin.
If you are planing of installing OpenWebMail, you will need the Perl Update.
Available from my Dincom mirror
config.inc.php
perl-MIME-Base64-3.05-1.i386.rpm
chmod all files 777 prior to making the tar. This avoids
problems later during the install process.
In this example, all files are placed into a single tar
file called files.tar
(19 files in total approx 47Mb)
The file is then placed on a web server in the following location.
http://www.your_domain.tld/files.tar
We shall be using this file in Step 4.

Step 2 - Base Install of CentOS 3.6 on slave machine
Install centos 3.6 on an old Pentium I i386 with the
minimum amount of packages. Do not install a boot loader.
System with >256mb Ram and no mouse connected.
(No mouse saves on errors later !)
Let's get started. Boot your i386 PC from the CentOS 3.6 disk 1

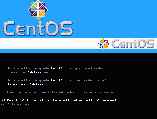
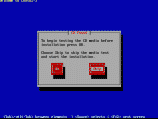
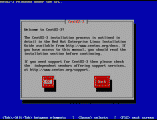
Fig.01 - Fig.03
Fig.01 shows
the options after you boot. Enter "linux text".
boot: linux
text[ENTER]
Fig.02 CD Found
Skip the CDROM media test by selecting [Skip].
[Skip]
The anaconda system installer will probe for system hardware.
Fig.03 CentOS-3
At the CentOS welcome message, select [OK].
[OK]

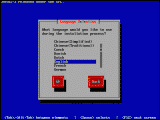
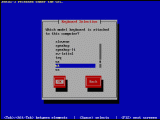
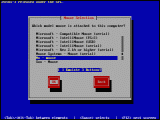
Fig.04 - Fig.06
Fig.04 Language Selection
Select the language for installation.
English [OK]
Fig.05 Keyboard Selection
Choose the keyboard type corresponding to your PC.
uk [OK]
Fig.06 Mouse Selection
Select no mouse. If you configure a mouse, errors will be seen during
the boot in the RaQ.
No - Mouse [OK]

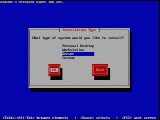
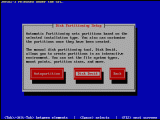
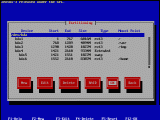
Fig.07 - Fig.09
Fig.07 Installation Type
Select "Server" installation.
Server [OK]
Fig.08 Disk Partitioning
Setup
We have to manually configure the drives for the BlueQuartz install.
Therefore select [Disk Druid].
[Disk Druid]
Fig.9 Partitioning
using disk druid.
In this example we are using a 20 GB hard disk. Partitioning
the drive, with partition sizes in line with the NuOnce CentOS4-BQ
Install CD.
Put the cursor on /dev/hda.
/dev/hda [New]
Add 5 partitions, with details as follows.
[/root]
Mount Point: /
File
System Type: ext3
Allowable Drives: [*] hda
Size
(MB): 6016
(*) Fixed Size [OK]
[/swap]
Mount Point:
File System Type: swap
Allowable
Drives: [*] hda
Size (MB): 1024
(*) Fixed Size [OK]
[/var] The rpm database, log files, etc., go here.
Mount Point:/var
File System Type: ext3
Allowable
Drives: [*] hda
Size (MB): 4096
(*) Fixed Size [OK]
[/tmp]
Mount Point:/tmp
File System Type: ext3
Allowable
Drives: [*] hda
Size (MB): 1024
(*) Fixed Size [OK]
[/home] Site and user data directories, mail spool, etc.,
go in the /home partition.
Mount Point:/home
File System Type: ext3
Allowable
Drives: [*] hda
Size (MB):
(*) Fill All available Space [OK]
When all the partitions are set up, select [OK] to continue.
[OK]

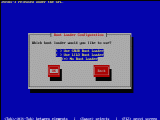
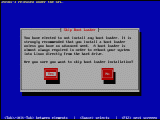
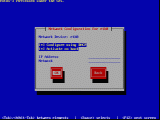
Fig.10 - Fig.12
Fig.10 Boot
Loader
Select NO boot loader. The RaQ will boot from
the BIOS/rom.
(*) No Boot Loader [OK]
Fig.11 Skip Boot Loader
Select to confirm.
[Yes]
Fig.12
Network Configration for eth0
Select either DHCP or "Activate on boot."
At this stage I select DHCP. Later in the process when we first boot
the RaQ we will be given the option to change this again.
[*] Configure using DHCP
[*] Active on boot
IP adress:
Netmask:
[OK]

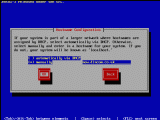
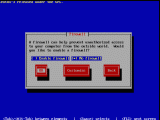
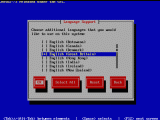
Fig.13 - Fig.15
Fig.13
Hostname Configration
Enter the host's fully-qualified domain name
(FQDN). For example, new.dincom.co.uk
Hostname: new.dincom.co.uk [OK]
Fig.14 Firewall
Configration
For this example, I will assume you are behind a hardware firewall
or router (with firewall), therefore no software firewall is required.
(*) No Firewall [OK]
Fig.15
Language Support
Being a true Brit, I select 'real' English! ;)
[*] English (Great Britain)[OK]

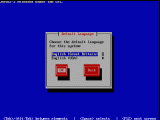
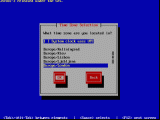
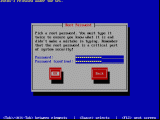
Fig.16 - Fig.18
Fig.16
Default Language
Select the default language for the system to
run in.
The Union Jack is out again !
English (Great Britain)[OK]
Fig.17 Timezone
The settings here will be changed in the BlueQuartz installation.
If the time in the BIOS is set using UTC, check the box. If your
clock is set to local time, e.g. Europe / London, leave the box unchecked.
[ ] System Clock uses UTC
Europe/London [OK]
Fig.18
Root Password
Choose a password, however the BlueQuartz setup
wizard will change this.

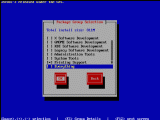
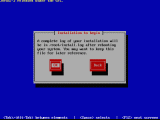
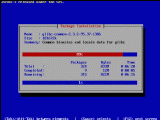
Fig.19 - Fig.21
Fig.19
Package Group
You need to select a few packages in addition to those
included in the base "Server" install. Select DNS Name Server, Printing
Support, Text Based Internet, and Windows File Server.
[*] DNS Name
Server
[*] Printing Support
[*] Text-based
Internet
[*] Windows File Server [OK]
Fig.20Installation
to begin
Select [OK].
[OK]
Fig.21
Formatting...Copying Files, Package Installation
After formatting the partitions, copying the required files.
The installation starts.
This will take a while.

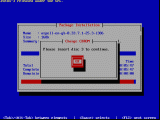
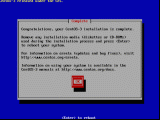
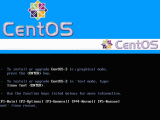
Fig.22 - Fig.24
Fig.22
Change CD-ROM
Insert the CD-ROM's as requested and select [OK].
[OK]
Fig.23
Complete
When the installation is complete, this message
will be displayed.
Replace the first CentOS CD-Rom.
Select [OK] and the system will reboot.
[OK]
Fig.24
Rebooting to the CentOS boot selection screen. Enter "linux rescue".
boot: linux rescue[ENTER]
Once again you will be asked to enter the following information:
Choose A Language [OK]
Keyboard Type uk[OK]
Setup Networking [Yes]
Network Configuration[*] Configure using DHCP [OK]

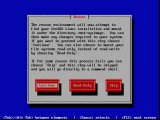
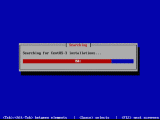
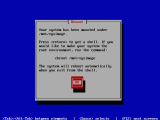
Fig.25 - Fig.27
Fig.25 Rescue
Select [Continue]
[Continue]
Fig.26 Searching
The system will search the drive for the location of the
CentSO-3 installation.
Fig.27 Rescue
Once the CentOS location has been found. the system will
mount it under /mnt/sysimage. Select [OK]
[OK]

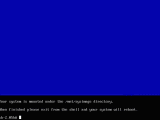
Fig.28
Fig.28
The command line will now be displayed.
This is where we start to have fun!

Step 3 - Getting ready for the RaQ
The system is now in rescue mode. We will now
update the files and libraries required to boot the RaQ using this drive.
Change the root to the mounted root found at the end of the
previous section at Fig.27
# chroot /mnt/sysimage
Remove the previously installed modules.
# rm /etc/modules.conf
Copy and untar files.tar , made at the end of Step 1
# mkdir /tmp/setup/
# cd /tmp/setup
# wget http://www.your_domain.tld/files.tar
# tar -xvf *.tar
Replace the i686 C libraries with i386 ones.
# rpm -ivh --force glibc-*.i386.rpm
# rm -Rf /lib/i686
Replace the i686 openssl/openssh libraries with i386 ones.
# rpm -ivh --force openssl-*.i386.rpm
# rpm -ivh --force openssh-*.i386.rpm
Webalizer requires an addition library file libgd.so.1.8 , the following rpm includes this.
# rpm -ivh gd-1.8.4-12.3.1.i386.rpm
Install the panel lcd programs.
# rpm -ivh panel*.rpm
Copy the kernel over.
# mv vmlinux.bz2 /boot/
Move and extract the kernel modules to their correct place.
# mkdir /lib/modules/2.4.25
# cp modules.tar.gz /lib/modules/2.4.25/
# cd /lib/modules/2.4.25/
# tar -zxvf *gz
Remove the unwanted .gz file.
# rm *.gz
Take out the virtual consoles.
# vi /etc/inittab
You should remove or comment out the following 7 lines:
1:2345:respawn:/sbin/mingetty tty1
2:2345:respawn:/sbin/mingetty tty2
3:2345:respawn:/sbin/mingetty tty3
4:2345:respawn:/sbin/mingetty tty4
5:2345:respawn:/sbin/mingetty tty5
6:2345:respawn:/sbin/mingetty tty6
x:5:respawn:/etc/X11/prefdm -nodeamon
Make the lcd device file. Using the following command:
# mknod /dev/lcd c 10 156
Make the locks directory for the lcd panel
# mkdir /etc/locks
You have now finished this stage. You can power down the
PC, and take the drive out.

Step 4 - Booting the New operating system in the RaQ.
The loaded drive is now fitted to the RaQ.
Connection of the null-modem is also made at this point.
You will need to run some form of terminal program on a
system connected to the other end of the null-modem.
I happen to use a Windows system with it's
Hyper-Terminal. Settings are
115200-8-N-1

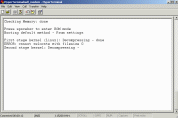
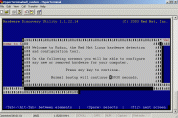
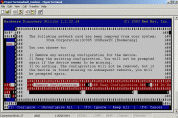
Fig.29 - Fig.31
Fig.29 Powering On
I have had problems if trying to connect with Hyper-Terminal
prior to turning on the RaQ. Everything locks up. To get around this,
power on the RaQ first. Wait 2 seconds, then connect with Hyper-Terminal.
(I've not tried this with any other software, so it could be
just down to Hyper-Terminal)
Once the terminal is running, hit [Enter] a couple of times to connect.
You can now watch the RaQ scroll through it's boot process.
Fig.30 Kudzu
If all goes well, you will see the system boot up.
Running through all it's checks and finally displaying
the Kudzu Welcome Screen
I obviously have the wrong character set selected so things look
a little strange. But we can still work with this.
[Press any key to continue]
Fig.31 Kudzu
configure devices screen.
Kudzu will indicate that the configuration has changed.
You will be prompted for what to do. Selecting the Function 2
key will automatically Configure / Unconfigure All.
[F2] Configure / Unconfigure All

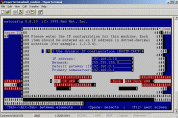
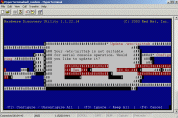
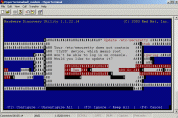
Fig.32 - Fig.34
Fig.32 Network Setup
Enter here your network settings. The following are the settings I use:
Fig.33 Update /etc/inittab
The inittab file needs to be updated to allow serial console operation.
Select [Yes]
Fig.34 Update /etc/securetty
The securetty file needs to be updated to allow root access to the ttyS0/COM Port.
Select [Yes]

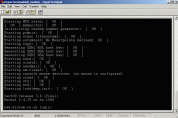
Fig.35
Fig.35
Once Kudzu has completed it's harware configuration, the system will continue
to boot to the command login screen.
Logon as root with password as entered in
Step-3 (Fig.18)

Step 5 - CentOS Update
The final stage before installing BlueQaurtz is to make sure the install
is up to date. At this stage we will also add a number of extra packages
required by BlueQuartz.
Update the system using yum.
Before yum can work you will also need to obtain the gpg key.
# rpm -import http://mirror.centos.org/centos-3/3.6/os/i386/RPM-GPG-KEY-CentOS-3
# yum update
# yum install php bind-chroot openssh telnet-server expect net-snmp perl-DB_File ntp perl-URI
Remove un-needed services
# /sbin/chkconfig --del cups
# /sbin/chkconfig --del isdn
# /sbin/chkconfig --del pcmcia
# /sbin/chkconfig --del kudzu

Step 6 - Installing The Bluequartz GUI
Thinking ahead in Step-1 has left the BlueQuartz
install file already on the system in the /tmp/setup directory.
The archive is therefore unpacked and installed.
# cd /tmp/setup/
# tar -xvzf BlueQuartz-5100R-CentOS3-i386-2006011501.tar.gz
# cd Blue*
# ./install.sh
(I know your next question ! There are 206 items !)
# ./update.sh
Until now you would have not seen much life in the LCD screen.
It's now time to add/replace the required files.
# cd /tmp/setup/
# cp dincom-lcd* /
# cd /
# tar -xvf dincom-lcd1.tar
# tar -xvf dincom-lcd2.tar
Refresh the services (To enable the LCD)
# /sbin/chkconfig --add network
# /sbin/chkconfig --add cced.init
# /sbin/chkconfig --add snmpd
# /sbin/chkconfig --add named
# /sbin/chkconfig --add sshd
# /sbin/chkconfig --add admserv
# /sbin/chkconfig --add sendmail
# /sbin/chkconfig --add httpd
The install is now basically complete. You will be able to connect
to the BlueQuartz login webpage at
http://192.168.0.10/login
User admin and password admin.
A series of configuration pages will assist in completing the web setup.

Step 7 - Additional Packages / Notes
At this stage it's worth doing a yum update to ensure you have the latest
versions of programs on you system.
# yum update
Install the GUI based firewall:
# yum install base-firewall-capstone
If the display (LCD) is not showing the complete domain name and
IP details, don't worry at this stage. This is reset during the next reboot.
The LCD display is also a 'Work in Progress'. The boot and operation are
limited compared to the standard RaQ.
Remove the audit service errors:
# echo 'alias char-major-10-224 off' >> /etc/modules.conf
# echo 'alias char-major-4 off' >> /etc/modules.conf
# echo 'alias char-major-6 off' >> /etc/modules.conf
# echo 'alias hid off' >> /etc/modules.conf
# echo 'alias keybdev off' >> /etc/modules.conf
# echo 'alias mousedev off' >> /etc/modules.conf
Install mysql support:
# yum install mysql-server mysql php-mysql
# /etc/rc.d/init.d/mysqld restart
# /sbin/chkconfig --add mysqld
# /sbin/chkconfig --levels 345 mysqld on
Virtual Sites:
The default setting in the current version of BlueQuartz
will not allow for the generation of a vsite of the same name as
the host system.
The walkaround for this is to remove some lines from the script file
/usr/sausalito/handlers/base/vsite/unique.pl
#vi /usr/sausalito/handlers/base/vsite/unique.pl
Comment out or remove the following lines;
my @oids= $cce->find("System");
my ($ok, $system) = $cce->get($oids[0]);
# don't allow system FQDN as the vsite FQDN
my $system_fqdn = lc($system->{hostname} . "." . $system->{domainname});
my $vsite_fqdn = lc($vsite_new->{fqdn});
if ($system_fqdn eq $vsite_fqdn) {
$cce->bye('FAIL',
"[[base-vsite.systemFqdnNotAllowed,fqdn='$vsite_new->{fqdn}']]");
exit(1);
}
Install phpMyAdmin:
Not the latest version I know, but stable.
# cd /home
# wget
http://heanet.dl.sourceforge.net/sourceforge/phpmyadmin/phpMyAdmin-2.7.0-pl2.tar.gz
# tar -xvzf phpMyAdmin-2.7.0-pl2.tar.gz
# mv phpMyAdmin-2.7.0-pl2 phpmyadmin
# echo 'Alias /phpmyadmin /home/phpmyadmin' >
/etc/httpd/conf.d/phpmyadmin.conf
# cd /tmp/setup/
# chmod 644 config.inc.php
# cp config.inc.php /home/phpmyadmin/
# /etc/rc.d/init.d/httpd restart
If you are still running on the 'private IP address' 192.168.0.10,
the phpMyAdmin can be accessed as follows.
http://192.168.0.10/phpmyadmin/
User root and no password.
Obviously with no password it's a 'little' insecure.
First job inside phpMyAdmin is to add a password !
Visit the BQWiki and look at the phpMyAdmin article by
Dogsbody for further advice
on setting up site/webpage access to the database.
/tmp/setupfiles directory:
This directory has been used during the installation process as
working/tempory space. Once complete, don't forget to tidy up the
system by removing it.
Webmail:
There are many flavors of webmail that can be loaded.
I have personally been using Openwebmail on RaQ's for a few years
without any problems. Visit Randy Smith's site at
http://home.lewiscounty.com/~forhire/owm.html
for a CentOS/BlueQuartz version as a .pkg file.
The version 003 of the CentOS-3-i386 package requires an
addition Perl update prior to loading. I've built the required rpm
and this is due to be added to a future version of the OWM package.
Until the release of the update, download the following file and install
PRIOR to installing the Openwebmail.....pkg file.
Install the Perl rpm using the --force option, i.e.
# cd /tmp/setup
# rpm -ivh --force perl-MIME-Base64-3.05-1.i386.rpm
(If anyone requires the source file, it can be found
here
Another popular webmail package is Squirrelmail.
Squirrelmail can be installed via yum from the command line.
# yum install Squirrelmail

Credits
Many sites and forums have inspired me to put this page together.
There are many things I didn't know before before digging deeper.
This is therefore my "thank you" to the community. I've tried to make
this idiots guide simple, yet complete. If you want to waste a weekend
having fun with your old RaQ, go for it. I hope this page makes
the task a little easier.
The following are just a handful of the many sites that have been
of great value;
|

